The Woodcock Network

Patron ~ The Duke of Northumberland, DL, MRICS
Scientific Advisor ~ Dr Andrew Hoodless, Game & Wildlife Conservation Trust
Veterinary Advisor ~ John Chitty, BVetMed, CertZooMed, CBiol, MIBiol, MRCVS
Veterinary Advisor ~ Chris Davis, BVM&S, MRCVS
Director ~ Owen Williams
Supported by
PJE, Chartered Accountants
Website design by
Garganey Consulting
Woodcock Ringing Guide
All bird ringing in the UK is controlled by the British Trust for Ornithology. Ringing is only allowed by those granted a permit by the BTO or who are undergoing training by a BTO ringing instructor. The catching of wild birds outside the authority of the BTO is illegal under the terms of the Wildlife and Countryside Act.
Training
When you have successfully completed your training you will be issued with a restricted BTO ‘C’ Permit, which will enable you to ring woodcock unsupervised. Your trainer will still oversee your activities will be needed to authorise the supply of ring to you from the BTO During your instruction your trainer will need to satisfied that you are proficient in the catching, handling and safely placing a rings on woodcock, along with being able to age birds and take various measurements whilst causing the minimum of stress to the bird in the process. The time it takes to acquire your ‘C’ permit will largely depend on the amount of time you are prepared to dedicate to ringing and you general aptitude in handling birds. Ringing is a serious scientific activity undertaken for research so it is important that as a trainee and later as a permit holder you do nothing to bring bird ringing into disrepute.
Consent
One of the primary conditions of your license is that you obtain permission from the landowner or relevant authority on the site on which you wish to operate. Many sites suitable for woodcock will be on land that is managed by a farmer or gamekeeper so it is important that you contact these people to request permission to access land prior to each visit. This is vital as there may be issues with stock or game birds that you need to be aware of. When out ringing take extra care to ensure that you cause the minimum of disturbance to either stock or crops and that all gates a closed after you have used them. Avoid lamping close to cover or woods where game birds may be roosting, remember carelessness could result in the loss of a valuable ringing site.
Catching
You will be catching woodcock using the ‘dazzle and net’ technique. This involves locating your woodcock feeding on open grassland at night using a lamp. For more details please contact The Woodcock Network on 01974 272654.
Ageing
Take a close look at the wings and decide whether you have a juvenile or adult. Key indicators are the primary feathers, which have abraded tips if it is a Juv and clean smooth tips if and adults. Another check is the upper primary covert tips which will appear to have lighter and narrower tips in an adult whereas in the juvenile the colour is nearer to the background reddish colour of the rest of the feather. Underwing coverts in the juvenile have a more pointed tip compared with those of an adult that have a more flattened tip, in some case you will see a mixture of both in birds moulting between juvenile and adult plumage. One final indicator is the shape of the trailing edge of the innermost primary feathers which tend to align in a straight line in adults whereas in juvenile to give a scalloped appearance. Juveniles caught before January 1st should be logged a 3 in your records indicating that they were hatched in that calendar years, with adults as 4. After January 1st juvenile are logged as 5 and adults 6.
Ringing
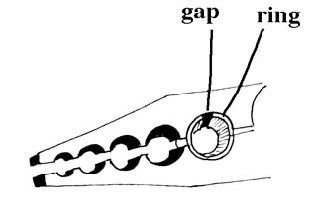
Whilst being trained your instructor will be able to pass you the ring and the tools you need, they will also make notes of the ring number and the measurements you make. It is normal to place the ring on the right leg of the bird. You will need to be sitting so take a plastic bag to sit on, as the ground will be wet. Hold the bird with it’s head towards you and belly up on your lap, this way the birds tail and wings don’t get ruffled and the bird will normally be passive. Hold the right leg and place the ring onto the shaft making sure that it is the right way up to read when the bird is standing. The leg is oval in shape so ensure that the ring is aligned with the gap uppermost. Taking the pliers in your right hand place it over the ring so that the gap in the ring lies at 90 degrees to the gape of the pliers. Ensure that the ring and the pliers are up the shaft of the leg and away from the hind toe and that the ring is seated neatly in the circle of the pliers. Once satisfied that all is correct squeeze the pliers until the gap in the ring closes around the leg and the ends are butted, finally give the pliers a firms squeeze to make sure that the ring has formed an O shape and is fully closed around the leg.
Once this is done remove the pliers and check that the fit is good and that the ring moves freely.
Wing Measurement
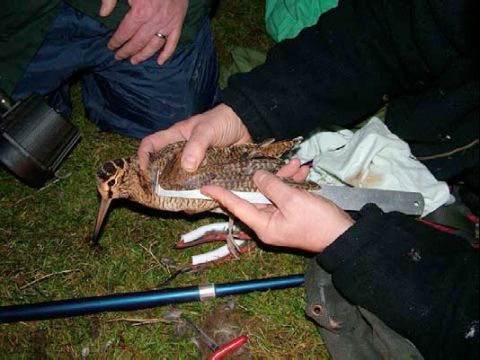
This is probably the hardest measurement to take accurately. Hold the bird belly down using the ringers grip with its’ head away from you. With your other hand pull the wing away from the body without opening out the primaries and ensuring that they remain parallel to the body. Take the ruler and slide wing forwards so that the joint of the wing butts with the end plate of the ruler, then with your fingers slide the primaries so that they run down the length of the ruler. The natural shape of the primaries is slightly curved towards the body so you need to straighten this to get an accurate measurement. Whilst holding the primaries onto the ruler you need to exert slight pressure to the middle of the outer edge of the wing with your index finger so that you have a straight line running from the joint to the tip of the primaries. Before taking your measurement check that the joint is still tight onto the end plate of the ruler.
Your trainer will check your measurement to ensure you are doing it accurately. If you are right handed you will probably find it easier measuring the left wing.
Beak Measurement
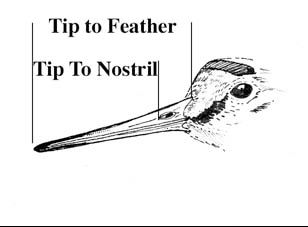
The standard procedure is to measure the length of the beak from tip to “feather’ this is the point where at the top of the beak the feathers start. We also measure from the front line of the nostril to the tip. The best technique for holding the bird for the measurement is to hold it against your body ensuring that its body lies flat against yours and not pulled into you tail first. Then gripping it lightly between your forearm and your body hold the bird’s head using the ringers grip and take the measurements using either callipers or a ruler.
Weighing
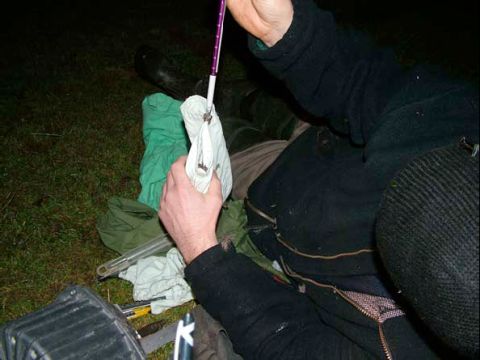
Weighing is done by first placing the bird in a cotton bag. Do this by pushing the beak down onto the breast of the bird and slide it into the bag headfirst and pull the drawstring tight. You will be using a spring balance which should be zeroed with the bag fitted, try to keep the bag steady and out of the wind and ensure that you hold the balance at eye level to take your reading. When you have done this remove the bird carefully from the bag using the ringers grip once again.
Release
Before you release the bird give it a final check to ensure that it is fit and as unruffled as possible.
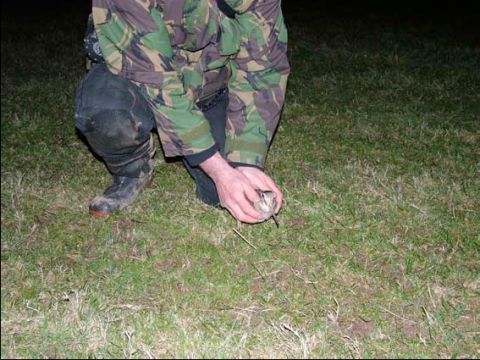
Take the bird and place it gently on the ground, often the bird will sit quietly for a few second before flying away. Ensure that you don’t release the bird near to obstacles or power lines to minimise the risk of collision in its haste to get away.
Finally complete your records by noting the time of capture; this is recorded to within the nearest 10 minutes, ie. 22.30 or 22.40. and record your name as the ringer. Other information needed for your records is the name of the site and weather conditions on the night. Also take care to record any unusual physiological details seen whilst handling individual birds and keep a tally of the total number of birds seen on the site during your activities. Should you re-capture a bird record its ring number, time and location of capture and record the usual biometric data.
Once you have completed the exercise, have a look around on the ground to ensure that you have picked up all your tools; there is nothing worse than having to backtrack to find lost objects in the dark. It is worthwhile developing the habit of doing all your processing of the bird over your net, that way there is less risk of leaving tools behind.
All content and images © 2009-2015 Owen Williams and The Woodcock Network Ltd - charitable registered company No. 7289034